The Complete Guide to Golden Hour Photography
Plan the light for your shoot
Choose a place and an optional date for sunrise, sunset, golden hour, and twilight. Leave the date blank for today.
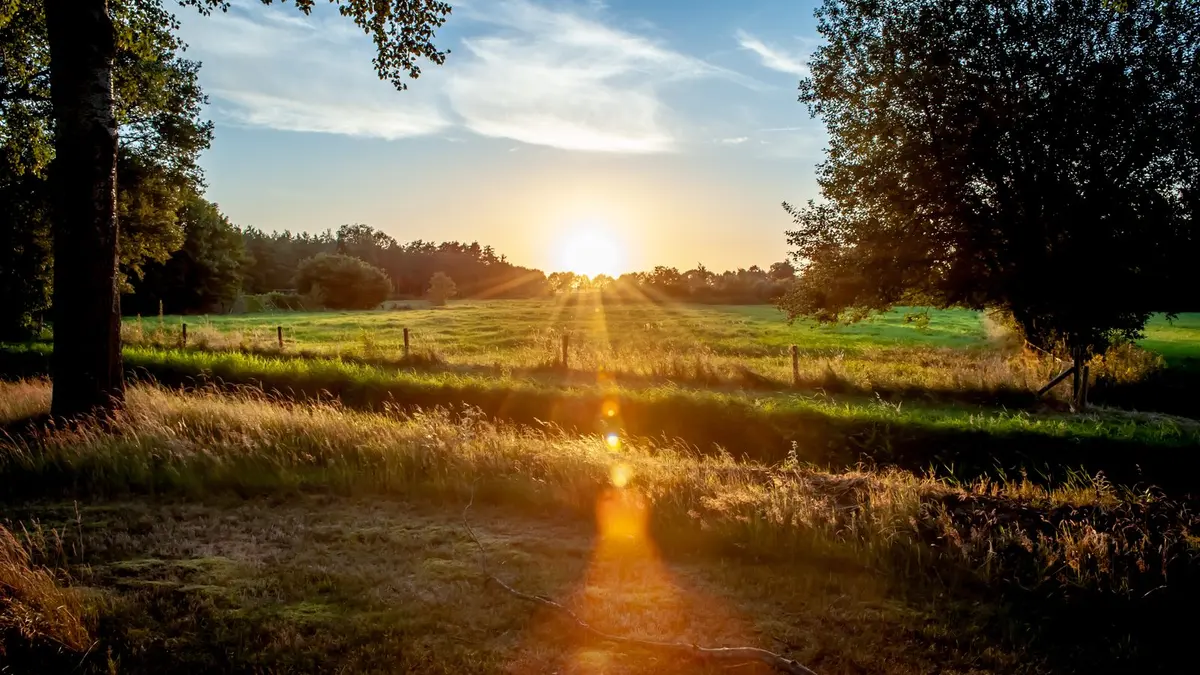
Golden hour is the most sought-after light in photography. It’s the short window just after sunrise and just before sunset when sunlight travels through more of the atmosphere, producing warm tones, soft shadows, and a natural glow that flatters every subject. Understanding when and how to use golden hour can dramatically improve your photography — whether you’re shooting landscapes, portraits, architecture, or street scenes.
What Is Golden Hour?
Golden hour refers to the period when the sun is low on the horizon, roughly between 0° and 6° of altitude. During this time, sunlight passes through a much thicker layer of atmosphere compared to midday. This extra atmospheric travel scatters shorter blue wavelengths and lets the longer red, orange, and yellow wavelengths dominate — producing that characteristic warm, golden light.
Despite the name, golden hour doesn’t last exactly one hour. Its actual duration depends on your latitude, the time of year, and local weather conditions. Near the equator, golden hour can be as brief as 20–30 minutes because the sun rises and sets almost vertically. At higher latitudes — places like Seattle, Minneapolis, or Anchorage — the sun crosses the horizon at a shallower angle, stretching golden hour to 45 minutes or even longer during certain seasons.
When Does Golden Hour Happen?
Golden hour occurs twice a day:
- Morning golden hour begins at sunrise and lasts until the sun climbs above roughly 6° altitude.
- Evening golden hour starts when the sun drops to about 6° altitude and ends at sunset.
The exact timing shifts throughout the year. In summer, sunrise happens earlier and sunset later, so golden hours occur at different clock times than in winter. The duration also changes — summer golden hours at mid-latitudes tend to be longer because the sun’s path across the sky is more gradual near the horizon.
To plan a shoot, you need to know the precise sunrise and sunset times for your location on your specific date. Tools like todaysuntimes.com calculate golden hour start and end times for thousands of US cities using real-time astronomical data, with times rounded to the minute. Select your shoot date, then allow for the actual horizon and weather.
Why Golden Hour Light Is Different
Several atmospheric phenomena combine to make golden hour light special:
Rayleigh Scattering
Sunlight is made up of all visible wavelengths. When it enters the atmosphere, air molecules scatter shorter wavelengths (blue, violet) more than longer wavelengths (red, orange, yellow). At midday, the sun is overhead and light travels a relatively short path through the atmosphere, so the sky appears blue with white-ish sunlight. During golden hour, light travels through much more atmosphere — sometimes 10 to 40 times more — which strips away most of the blue light before it reaches you. What remains is warm-toned and diffuse.
Lower Contrast and Softer Shadows
When the sun is low, its light arrives at a steep angle relative to your scene. This creates long, directional shadows that add depth and dimension — but because the light has been diffused by its long atmospheric path, those shadows are softer and less harsh than they would be at noon. The ratio between the brightest highlights and the darkest shadows (the dynamic range) is lower, which means your camera can capture more detail across the entire scene.
Natural Warmth
The color temperature of golden hour light is typically between 2,500K and 3,500K — much warmer than the 5,500K–6,500K range of midday sun. This warmth is especially flattering for skin tones and adds a sense of mood and atmosphere to landscapes. The warm light also interacts beautifully with water, glass, and metallic surfaces, creating vivid reflections and glowing highlights.
How to Plan a Golden Hour Shoot
Successful golden hour photography is mostly about preparation. The window is short, and once the light fades, it’s gone.
1. Check the Times
Before your shoot date, look up the exact sunrise and sunset times for your location. Don’t rely on rough estimates — even 10 minutes can make a difference. Check golden hour timing on todaysuntimes.com by searching for the nearest city. Note both the start and end of golden hour, and plan to be on location and set up before it begins.
2. Scout Your Location
Visit your shooting location ahead of time, or use satellite maps, to understand which direction you’ll be facing and where the sun will be relative to your scene. In the morning, the sun rises in the east (roughly — the exact azimuth varies by season). In the evening, it sets in the west. Plan compositions that take advantage of the light direction:
- Front lighting (sun behind you): Even illumination, vivid colors, fewer shadows.
- Side lighting (sun at 90°): Strong dimension and texture, dramatic shadows.
- Backlighting (shooting toward the sun): Silhouettes, rim light, lens flare, translucent glow through leaves or hair.
3. Arrive Early
Set up at least 15–20 minutes before golden hour starts. This gives you time to find compositions, set your camera settings, and be ready when the light peaks. Golden hour changes rapidly — the quality and direction of light shift minute by minute, so having your composition locked in lets you focus on capturing the light as it evolves.
4. Watch the Weather
Cloud cover dramatically affects golden hour. A completely clear sky gives clean, warm directional light. Partial clouds can be even better — the undersides of clouds catch golden light and create dramatic color across the sky. Full overcast usually kills golden hour entirely, producing flat, diffused light without the warmth.
Check the forecast, but don’t cancel for a few clouds. Some of the most dramatic golden hour photos happen when broken clouds interact with low-angle sunlight.
Camera Settings for Golden Hour
Exposure
Golden hour light changes fast, so check your exposure frequently. Auto-exposure can be tricked by bright skies or strong backlighting. Shoot in manual or aperture-priority mode and keep an eye on your histogram. If you’re shooting toward the sun, you may need to add +0.5 to +1.5 stops of exposure compensation to prevent your subject from becoming a silhouette (unless that’s the look you want).
White Balance
Set your white balance to “daylight” or “cloudy” rather than auto. Auto white balance will often try to neutralize the warm tones — exactly the opposite of what you want. Daylight white balance (around 5,200K–5,500K) will preserve the natural warmth. Cloudy (6,000K–6,500K) will enhance it further. If you shoot in RAW, you can fine-tune white balance later without any quality loss.
Aperture
Choose your aperture based on the subject:
- Landscapes: f/8 to f/11 for maximum sharpness across the frame. Stopping down too far (f/16+) introduces diffraction softening on most lenses.
- Portraits: f/1.8 to f/4 for shallow depth of field and creamy bokeh. The warm background blur of golden hour is one of the most pleasing looks in portrait photography.
- Starburst effects: f/16 to f/22 if you want the sun to appear as a starburst in your frame. The number of rays depends on the number of aperture blades in your lens.
ISO
Keep ISO as low as possible — typically 100–400. Golden hour light is dimmer than midday but usually bright enough for low ISO settings, especially in the first half of the window. As the light fades toward the end of golden hour, you may need to increase ISO or open your aperture wider.
Shutter Speed
If you’re shooting handheld, watch your shutter speed as the light dims. A good rule of thumb is to keep shutter speed at or above 1/focal length (e.g., 1/50s for a 50mm lens). Use a tripod if you want to shoot at slower shutter speeds for creative motion blur in water, grass, or clouds.
Golden Hour for Different Subjects
Landscapes
Golden hour is the classic landscape photography time. The warm, directional light reveals texture in terrain — sand dunes, rock formations, fields, and mountains all come alive with long shadows and warm tones. Shoot wide to capture expansive skies with golden clouds, or focus on details where the light rakes across texture.
Portraits
The soft, warm light of golden hour is universally flattering for skin tones. For the most pleasing results, position your subject so the light comes from the side or slightly behind them. Backlighting creates a glowing rim of light around hair and shoulders — a technique called “rim lighting” or “hair light” that separates the subject from the background.
Urban and Architecture
City buildings become golden surfaces during golden hour. Glass facades reflect warm light, long shadows stretch across streets, and the contrast between lit and shadowed surfaces creates depth. Shoot from elevated positions to capture cityscapes bathed in warm light, or work at street level where golden light filters between buildings.
Wildlife
Animals are often more active at dawn and dusk, making golden hour ideal for wildlife photography. The warm light adds drama to wildlife scenes and keeps you from dealing with harsh shadows on fur or feathers. Use longer lenses and be in position before the light arrives.
Blue Hour: The Bonus Window
Immediately after evening golden hour (or before morning golden hour), there’s a brief period called blue hour. Our calculator uses the sun between 4° and 6° below the horizon, and the sky takes on deep blue tones while artificial lights are visible but the sky isn’t fully dark. This is excellent for cityscapes, architecture, and any scene mixing natural and artificial light.
Its duration depends on location and season. Check the selected date’s blue-hour window and use a tripod when the exposure is too long to handhold. Other guides may use broader boundaries, so compare definitions as well as clock times. The contrast between warm artificial lights and cool blue sky makes for striking compositions.
Common Mistakes to Avoid
- Arriving too late. Golden hour’s best light often comes in the first or last 10 minutes. Missing the start means missing the peak.
- Only shooting at sunset. Morning golden hour is equally beautiful and often comes with calmer conditions — less wind, fewer people, morning mist.
- Fighting auto white balance. Lock it to daylight or cloudy. Let the golden light be golden.
- Ignoring the opposite sky. While everyone photographs the sunset, the sky opposite the sun often glows with soft pink and purple tones. Turn around.
- Stopping too early. Some of the most dramatic color happens in the minutes just after the sun dips below the horizon, during the transition from golden hour to blue hour.
Quick Reference
| Condition | Morning Golden Hour | Evening Golden Hour |
|---|---|---|
| Starts | At sunrise | ~45–60 min before sunset |
| Ends | ~45–60 min after sunrise | At sunset |
| Color temp | 2,500–3,500K | 2,500–3,500K |
| Best for | Calm conditions, mist, solitude | Clouds catching color, social shoots |
| Followed by | Normal daylight | Blue hour → night |
The key to great golden hour photography is preparation and consistency. Check the times, plan your location, arrive early, and shoot through the entire window. The more you practice reading and working with low-angle light, the more natural it becomes to anticipate how a scene will look as the light changes.